EWR Project – Phase Seven – Barbara ann ba ba

Saw Time
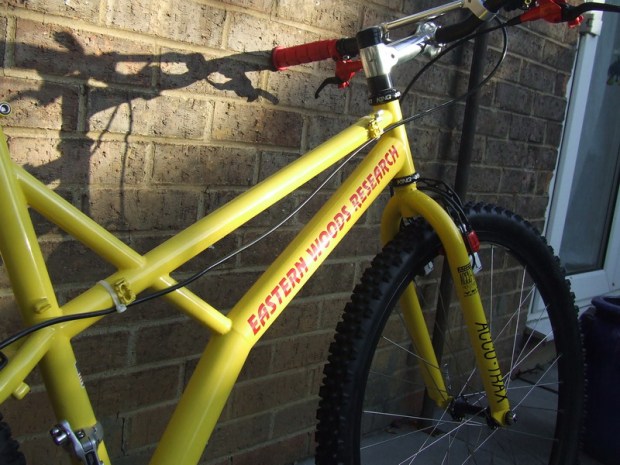
So, the Race Face bars were TOO wide so out came Mr Sandvik and I’ve lost 20mm of each end, sanded down the ends and reset the controls. Grips got refitted and some Helicopter Tape applied on the cabled side of the head tube and also on the Syncros Revolution cranks.

Minor tweak on saddle height too so it matches my Pace.

Freshly cut (and out of focus )


You should have seen them BEFORE they were cut!!!

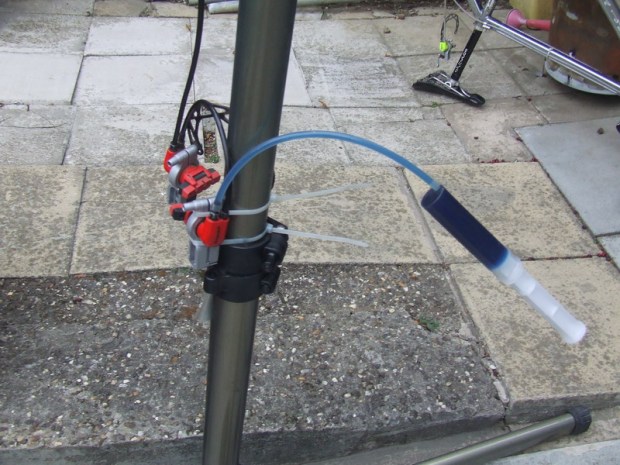
So, you’ve read about using GT-85 and WD-40, Hairspray, water, glue……what about the ‘Zip Tie Trick’? Well, it works a treat. Get two long and strong Zip Ties, feed them down inside the grip, one either side, so the ‘teeth’ side faces the grip….push to get it started, make sure any logos or patterns are lined up how you want them, then ‘ski’ them up using the ties by pulling the ends (for best results ziptie the ties together so you have a ‘handle’). Once they are all the way up, pull harder and the Zip Ties will slide out.

Zip Tricks

EWR Project – Phase Six…Dial Time

Another week, another configuration and I’m back in that pine forest again for some more shakedown time, it’s a shame the place is a 100 mile round trip from my house else I’d be blasting round there all weekend….sadly I only get to go once a week and after work as it’s near my office

Last week was the first ever ride on my EWR and it highlighted some ‘handling weirdness’ that needed ironing out….and fast, so last weekend I pulled the front end apart, switched from a 0° rise 135mm stem to a 10° rise stem, lost the 1″ rise Club Roost bars in favour of some Race Face Air Alloy in 1.5″ rise flavour, moved one poker chip above the stem (leaving 20mm of spacing below), dropped the saddle height by 20mm, nudged the rails back and bled the back brake so it’s now ultra vicious

As much as hunting down elusive bike parts is a whole lotta fun, there’s nothing more satisfying than dialling a bike in so the ride is El Perfecto. Plenty of bikes look good in pictures but ride like a wheelbarrow full of runny shit…

So, it got blasted round the woods in the pitch black and wet and gnarly tree roots hidden by freshly fallen leaves focussed the brain   

That aside, my OWB rides 100% better than it did last week but I think these bars are a bit too Cowhorn for my liking. Since 1988 I’ve ridden flat bars and bar ends so this whole riser bar thing is a little freaky to me full stop and these Race Face bars are about a mile wide ……

I suspect that if they stay on the bike they will be saying hello to my little friend….the Sandvik Hacksaw for some ‘amputational correctness’

Cowhorns in the pines

Good job the trail was wide here…

Cowhorns in the pines Part II

Magura HydroStops ‘Bleed Jig’

Magura HydroStops are very cool brakes…..no wait, they are not cool as in ‘hip CNC bike bling’ because they are bulky and most likely heavy (these are the reasons why most folk ‘dis’-like them). In my world which is a practical world where stuff on a bike needs to perform a task and perform it so well it doesn’t need tweaking while you are out on the trail, Magura HydroStops ARE cool
They are VERY powerful, work in the most hideous conditions if you use the right pads and once they are setup correct will carry on for decades.


The real bummer about Magura HydroStops is if you actually break the ‘system’ then you have a whole bunch of work to do. Most will know that they are a ‘closed/sealed’ hydraulic braking system filled with mineral oil and they have a master cylinder at the lever end and a slave cylinder at the pad end, with a connecting ‘bridge’ linking one side of the wheel to the other. Everything links up with tough plastic hose and at every junction there are compression joints using brass olives or bolt up connectors with barbed joints. If you buy a set of Magura HydroStops, hang them on your bike out the packet and just switch pads then your life will indeed be painless and full of smile inducing, aggressive stops, but if you meddle with lots of different bikes, pull HydroStop systems apart to replace parts or extend hoses then you are into the whole dull bleed routine.

Basically you need to pump fresh Magura Blood into the system, make sure no air gets it and fix everything back together but like most things in life the previous sentence was a LARGE understatement

So you check out the documentation that Magura supply….try doing it while the brakes are attached to your bike and sometimes you get lucky and sometimes you don’t. This is also one of those jobs where four hands would make it really easy and….listen carefully Magura……bleed valves that don’t need removing!!

Everyone has their own way to do this task but I’ve settled on using a ‘jig’ to do mine as it solves the gravity problems and it solves the ‘I wish I was an octopus’ problems too.

Take the brakes off the bike, fix them up on a workstand (or fence post) like in the pix below, fill the syringe to maximum, pump fluid through until your air bubbles have stopped and when you remove the overflow at the top get your finger over the hole and get that grub screw in there real fast. Now…..don’t do it up real tight but get it very close, keeping the Allen key in there, then reach down to the syringe and pump more blood through as you are tigthening, this maximises the fluid and prevents any air getting back inside.
Now the top is sealed tight getting the bottom end off is easier and if the fluid level falls slightly just fill up the bleed screw hole with fluid before you screw it back in. Your brakes should now be air free and powerful

Getting jiggy with it

Top end

Bottom end

EWR Project – Phase Five…Testing in Eastern Woods

So the time has come to test ride my baby…….where better to test a bike like this than some woods in the East of England 

I rushed out real quick before we got riding to snap some pix cos the light was failing fast (and so it turned out were my camera batteries), so excuses again for the lame picture quality but here is my EWR, where it belongs, back out in the woods again.

It’s still in testing mode so the stem spacers and stem are not permanent fixtures and the jury is still out on the handlebars….the bars are certainly ‘down in the weeds’ on this bike. Those blokes at EWR really know how to make a bike though, it rides beautifully and just goes where you point it. At slow speeds it is really ‘Trialsy’ and very responsive and at speed it just rolls and rolls and is just screaming at you to manual it off some tree roots and humps….this bike makes you grow horns 

This bike is going to get well used and to endure the British winter conditions I
have fitted Gore RideOn GoreTex durallier cables, these are PTFE coated
cables that run in a continuous, sealed sleeve which runs inside the
outer cable and is sealed with rubber ‘boots’ at the mech ends. They
are expensive but if you want to keep the mud and shit out and have
silky smooth shifting then these are the babies to fit.

Overall I am REALLY pleased with how it rides although I need to nail that bar/stem configuration and my back brake is non-existant, despite me bleeding it twice . The bottle cage is on there solely for my Lumicycle Halogen lights, this time of year we ride in total darkness. My buddies have ‘outgunned’ me with lights recently so I’m feeling a little inadequate…..one has the HID (Halide) Lumicycle lights and the other has Hope Visions AND some helmet mounted Ay Ups .

I guess I could even things up and buy a Lumicycle LED system


Back in the Woods again….where EWR’s belong…


Up close and personal….my Woods in the woods


Then it got dark….we had nearly two hours of flat out night riding

Mr K’s Day in the Peaks – RetroBike Meet

Mr K’s Day in the Peaks came around again for another year and despite initial scepticism about numbers, around 23 vintage MTB’s turned out for the 22 mile ride in Derbyshire’s Peak District. A good day was had by all and no serious injuries were incurred. I took my Pace RC200 as it seemed the perfect choice for the terrain, plus my EWR wasn’t quite ready

The Pace has Gore RideOn cables to keep all the mud and shit out, excellent brakes and 22-32-42/11-32 gearing for all them big hills
It got ridden hard all day, getting airborne more times that I would have liked and ridden over large rocks, tree roots, loose gravel, streams and anything else that got in the way.


Lots of comments and pix can be found HERE and some great photo’s can be found HERE.

Below are a few pix of my Pace in action…

Nearing the end of the climb to the Radio Mast near Brough (Gus, me, Mark and Ned)

Amphibious Pace….

Meet the local wildlife

Mam Tor heading for Hollins Cross

Jaggers Clough

Summertime, and the living is easy…Fish are jumping, and the cotton is high

Well almost……actually we never got much summer here but Friday was a rest day for me so to contradict the term I went out and nailed 30 miles of local trails on my Pace RC200.
Lyveden New Bield is a bizzarre thing to stumble across in the middle of knowhere (Aldwinkle St Peter) and is an unfinished Summerhouse built for Sir Thomas Tresham back in 1604. Nobody knows for sure why it never got finished but it looks very surreal in the surrounding landscape. The route took me 2 hours 45 minutes and I never saw another human on the trails, instead I watched Red Kites gliding and calling to each other in the midday heat, saw squirrels and rabbits going about their business and enjoyed the silence….

Lyveden Way Trail

Lyveden New Bield

Bearshank Track (Green Lane) – Red Kite territory

Byway near Aldwinkle

EWR Project – Phase Four

Sorry for the lack of recent updates, have been busy and got a little sidetracked on riding bikes instead of building them

I’m still on the hunt for some NOS Mavic 231’s to lace to the NOS DX hubs I have in transit but in the meantime I’ve switched back to the Campy rims I was playing around with before. They were drilled for Presta but a little encouragement with an 8.5mm drill and now they fit my stash of Schrader tubes.

The idea with this stage of the build is primarily to find out where the bottom bracket height is as I want to re-create the exact ride experience the bike was designed for. As a result of this I have grabbed the first pair of tires that came to hand that are going to be similar in height to the end product. I don’t think it’s quite where it needs to be as it currently measures 12.5″ to center of BB axle and I think the measurement should be to the base of the shell (I’m just checking this out with Kenn and Jay from EWR). I figured I would be about 20-25mm out with these forks anyway so it’s no real surprise.

This is the first time I’ve been able to throw my leg over this bike since I bought it and its great to have gotten this far. I’m part way through setting up the brakes and next on the list after that is fitting the gear cables and chain and taking her out for a test ride

It’s bike shaped Jim, but not as we know it

The sun sets over my yard….my OWB basks for the first time 🙂

EWR Project – Phase Three and a half :-)

Not much to report today, ran into several problems that I need to resolve before I go any further

The tyres I had down for this are too big (certainly for the back anyway).
I bought some Mavic/DX wheels from
RetroBike and when I fitted them they were very badly out of true .
So I tried a spare set of Campy/LX rims I had stashed in my shed but these were Presta drilled and all my tubes are Schrader
.
Also my rear hydraulic hose is about three inches too short so I’ll have to make up some fresh hoseline and bleed the rear brakes.


All this is a drag because I was planning to take it for a test ride this Thursday in my local forest……..you don’t mind while I scream a bit do you?

I’m off to find some Zen like calm (and some more bike parts…..)

My big steel pig is putting on weight

But doesn’t she look cool…?

NOS DX Thumbies and Magura ‘Tomac’

Overcrowded looking Answer Accu Trax

EWR Project – Phase Three

Finally after a few quiet weeks some progress with the EWR Project

The temporary Accu-Trax are now fitted and I want to see where the Bottom Bracket height ends up once it gets some wheels on, then take it for some test rides and see how it handles. The steerer has intentionally been left long for now so I can try out a few different stems and bar height combinations, then I will cut it again when I have picked a stem/bar height. Apologies for the poor pictures, I was losing light rapidly, wanted to avoid using the flash and the camera produces poor pix when you turn it off

Steerer/spacer mock up prior to trimming the steerer

Saw guide time!!

‘Test’ stem configuration (lots more to be cut, don’t worry!!)

Handlebars…..finally !!


EWR Project – Answer Accu Trax Re-wired…

If you’ve been following this you will recall I wanted to use an Answer Accu-Trax fork on this build. I wanted a rigid EWR and I believe this fork suits the frame well as it has nice chunky legs and is made of the same 4130 Cromoly as the frame, another thing I dig about Accu Trax is having the offset in the dropout as it gives a nicer ‘straight’ look to the forks, as opposed to the alternative which was a Kona Project 2 which have the offset at the crown.

I picked these up from the USA via eBay and got them for a great price as they are 1″. Also they were threaded so I had a bunch of work to do getting these converted to threadless (see HERE FOR DETAILS) . The whole thing is a temporary fix cos the EWR is 1 1/8″ and is suspension corrected so these 390mm forks might drop the front end too much.

Long term I will get the geometry/BB height 100% with a cunning plan….

I got a fellow RetroBike member to strip and repaint them yellow so they matched the frame better, I didn’t leave the frame with him so all he had as a reference was a tiny chip of paint. The result, plus some repro decals is ok for me and when I go for the permanent solution I will leave him the frame so the next set of forks can be matched 100%.

Some progress shots of the work:

Back from Dave Yates Cycles with ahead steerer conversion

Sandblasted ready for repaint

First coat of yellow over white base coat

Finished article with repro decals